

Sometimes, as a student, whether you are still in college or attending university, it can be hard to keep up with classes, lectures, assignments, extracurricular activities, projects, and social obligations. If you feel that using conventional planners and notebooks doesn't meet your needs, you may want to consider organizing your schoolwork with Notion.
With Notion, you can essentially track anything and everything, thanks to its high level of customization and user-friendly features. Having a workspace to organize your tasks, assignments, track scores, and store your class notes can be an invaluable tool. As an additional perk, Notion offers students a Pro plan for free.
Keep reading if you want to advance your study skills and learn more about how it functions.
First, what is Notion?

Notion is a powerful all-in-one workspace app that helps students organize their lives and projects. It combines a variety of productivity features, such as notes, wikis, tasks, and databases, into a single platform that is 100% customizable. Notion also offers collaboration features, allowing you to work with your schoolmates on various projects. Notion also offers a discount for their Pro account if you are a student, so you don't have to worry about the limits of the free plan.
Brief Overview of What Notion Is and How It Can Be Useful for Students
So, what can Notion do for you? Well, a lot. Thanks to its database, view, and pages functionality, a Notion template can work as your control hub for all your necessities as a student. If set up properly, a Notion workspace can be your all-in-one tool, replacing your notebook, planner, calendar, and to-do list. It's simple to use, easy to get started with, and it has a ton of features that make it especially useful for students.
Here are just a few of the ways that Notion can help students:
- Keep track of assignments and due dates
- Organize all your class information
- Take notes during classes
- Organize your study and tasks with a comprehensive system
- Collaborate with other students by sharing notes and working on group projects together
- Bookmark learning resources
- Create flashcards
- Help you learn faster thanks to its AI Tool
If this sounds interesting, let's keep up.
How to create a new Notion account
First, we need to set up a new Notion account, if you don't have one already. Notion offers both free and paid accounts. The free account provides everything you need to create your own student workspace, with the only limitation being sharing features and the maximum document size (5mb). However, the good news is that Notion also offers a student promo, allowing you to upgrade to a paid account for free!
Creating a Notion account is easy and only takes a few minutes.
-min.avif)
- Visit the notion website https://www.notion.so/product, click on Try it for Free,
- You can choose to sign up with your email, with a Google account or an Apple Account. Depending on your choose you’ve being asked to enter your personal information.
- A quick onboarding page will help you setup your content. Choose for “School”, and click Continue. Notion will ask a bit of information about your student life, but you can skip them if you prefer to go straight to your workspace.
-min.avif)
-min.avif)
- After the sign up, you’ll get to your workspace on the Notion web app. Notion can be accessed from the web (from www.notion.so), you can also download the app for Windows or Mac, and mobile.
- The newly created workspace features some basic page for you to get started. Be sure to follow the first-step page if you a a newbie.
The default workspace includes
- A Getting Started Page
- A Quick Note page
- A Personal Home page
- A Task-list pag
- a journal Page
- a Reading Page
-min.avif)
These template are a good starting point to explore Notion functionality, but don’t worry, we’re going to create a complete Student Dashboard later.
You're now ready to start using Notion and getting organized as a student. Be sure to check out our free template, to get started on the right foot.
Tips for Personalizing Your Notion Workspace to Make It Your Own
Notion can easily become your best ally, not only for organizing your schoolwork, personal life, finances, hobbies, and reading. Let's start by making it feel more like home.
We can start customizing our workspace by clicking on "Settings & Members".
Here, you can:
- Add a profile image for your workspace. Go to Workspace > Settings. Here, you can change the icon by adding your photo, an emoji, or you can go for a Notion-style avatar. (Internal Linking)
- Change the name of the account.
- Activate Notion AI (Optional)
Some other basic customizations you may want to set up are in the "Language & Region" section and customizing your workspace domain.
By default, Notion will assign you a random domain. Be sure to customize it as soon as possible. When you share it, it will be easier for your teammates to recognize if you add a custom name.
-min.avif)
Let's Create and Customize Our Dashboard
To organize our school necessities, we can start by creating a new dashboard.
Next, we can customize the appearance of your workspace. We can:
- Change the default font. For each page, you can choose from 3 font styles: Default (a sans-serif, modern font), Serif (a serif, classical font), or Mono (a monospace, vintage-looking font). You can also decide if you want to go for Small Text.
- Switch to Dark Mode. (Learn about Dark Mode here)
What about adding some color? You can do this by adding colored headers to your pages. Notion has a lot of great color options to choose from. You can navigate to Unsplash, choose a public domain high-quality image, or add one from the web or upload. So have fun experimenting!
You can change the cover of each page by using one from the ones Notion offers. You can also make a search on Unsplash, upload from your computer, or from the internet if you have the link to the online images.
- Change the icon. Every page icon in Notion can be changed. You can choose from emojis, the Notion default icon (in several colors), or you can upload your own icons or grab one from an online resource.
- Add a widget. Widgets are small tools that you can embed into your Notion workspace. For this tutorial, let's add a retro clock to our homepage.
- To do that, let's go to Indify. (continue)
- Add a music playlist. Love studying and doing homework with relaxing music, maybe some lo-fi? You can include as many playlists as you want from Spotify directly to your Notion page.
- Next, add some photos! Adding images is a great way to make your workspace more visually appealing and personal. You can add photos of yourself, your friends, your family, or anything else that brings you joy.
Saving Stuff from the Web
As a student, you probably need to have a place to save your bookmarks: articles you're reading, videos you're watching, books you need to read. With Notion, that's super easy to do with the Web Clipper.
The Web Clipper is a small extension that allows you to save anything from the web inside a Notion database. For example, you can create a research database and save your data there.
Install and use the Notion Web Clipper
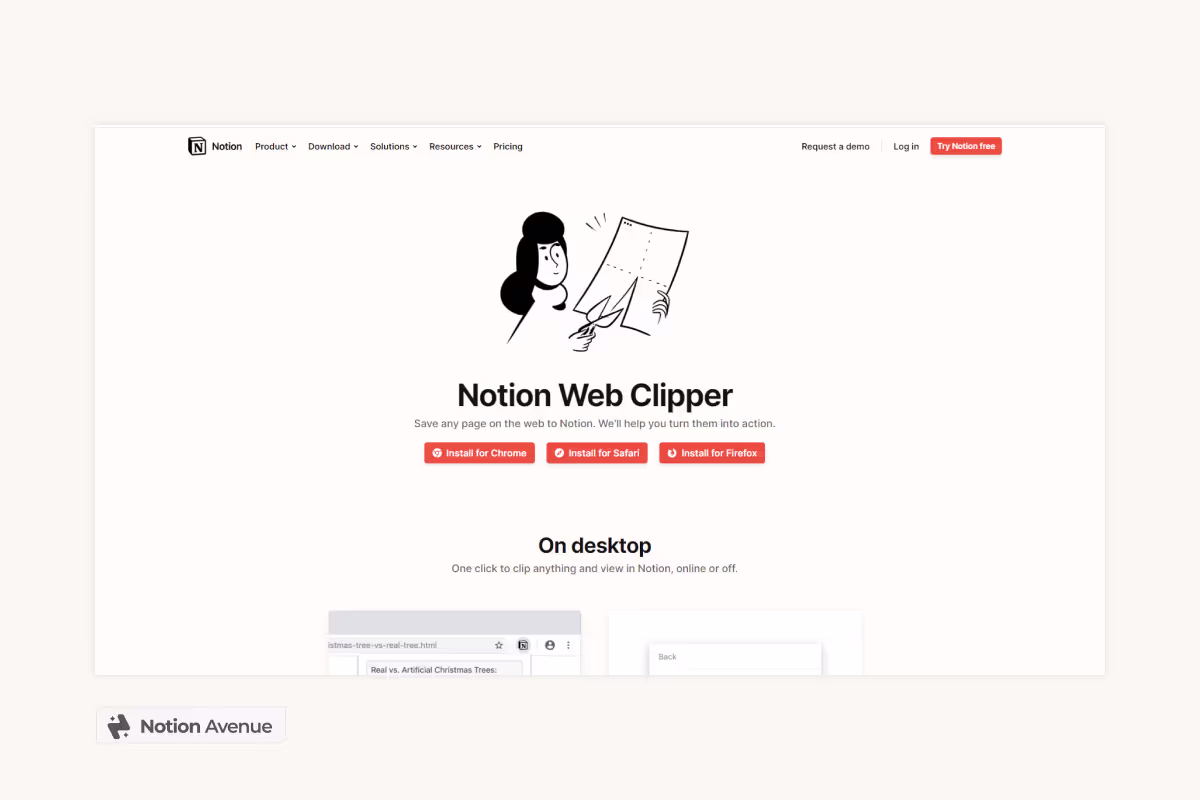
Notion Web Clipper is a tool that allows you to save web pages to your Notion workspace. This can be a helpful tool for saving articles, research, and other information that you want to be able to access later.
To install the Notion Web Clipper:
- Go to the Notion Web Clipper website.
- Click on the "Add to Chrome" button.
- Click on "Add extension" in the pop-up window.
- Once the extension is installed, you will see a Notion icon in the top right corner of your browser.
To use the Notion Web Clipper:
- Open the web page that you want to save.
- Click on the Notion icon in the top right corner of your browser.
- A window will appear asking you to choose which workspace and page (or database) you want to add the web page to.
- You can create a new database to save your web pages by clicking + New links database in the Add to menu.
- You can change the name of the page in the text box.
- If you'd like to clip into a page or database that already exists, it might not be included in the default list. You can search for it!
- Press Save page or enter.
To use the Notion Web Clipper on mobile:
- Open the Notion app on your mobile device.
- Click on the plus sign + in the top right corner of the screen.
- Scroll down and tap on "Web Clipper".
- Open the web page that you want to save.
- Tap on the share icon.
- Tap on the Notion icon.
- Title the page you're saving and choose which workspace and page/database you want to add it to.
- Tap Save.
How to Create and Organize Notes in Notion
In order to get the most out of using Notion as a student, there are a few best practices to keep in mind.
First thing, when taking notes, be sure to create separate pages for each topic or lecture. This will make it easy for you to keep everything organized and make it easier to find a specific note later on.
So you use Notion for Note-Taking. There are several ways to organize your notes, maybe you want to organize them by classes or by lecture. Let’s start with a simple note-taking page.
Create a new Notion Page, let’s call it "Classes".
Now list all your classes, like Math, English, History, and so on.
You can now turn this text into a page. Then inside each page, you can add a page for each note you want.
Note-Taking is easy with Notion and also customizable. You can insert images, tables, embedded PDFs, add videos, and a lot more.
Deciding how to structure your notes.
It’s better to set up an overarching structure for your notes. You can, for example, organize your classes by semester, and for each class, create a new page for each lecture or lesson.
Your structure can look like this:
Year > Semester > Classes > Lesson
Databases are also a powerful way to organize your notes. If you are a beginner, you want to check out this tutorial, but don’t worry. You can start by simply creating and storing pages one inside another and then move the pages inside a database when you become more proficient with Notion.
Notion Tips to Organize your Notes
Notion is a productivity tool that has extensive features for note-taking. For example, you can use the background color to highlight parts of the text and color code your notes for easy scanning and memorizing.
You can change the color of your notes by highlighting the text. The settings menu will open up, and from there, you can turn the text into headlines, bullet points, or numbered lists. You can also change the color of the text or background, make the text bold, italic, underline, or strikethrough.
Take advantage of the different blocks that Notion offers to structure your notes, making them organized, easy to read, and searchable.
Structure your Notes
Headlines help you divide the topic of the class or reading and organize the hierarchy of the information. There are three sizes of titles: Heading 1, Heading 2, and Heading 3.
You can quickly add a heading by typing (#, ##, ###) and pressing enter.
Adding headings to your notes is useful because it allows you to add a "bookmark" to each section.
Create a Table of Contents
If you add headings to your notes, you can then create a table of contents. This allows you to easily navigate through your content.
Add toggles
Toggle are another great way to interact with your materials. In fact you can use the toggle block, to “hide”
Shortcut : “Type >” and click Space
For example you can create a Toggle block and move the table of content inside. You can also turn a toggle into a Heading toggle to help you better organize your note.
Add divider
You can add a divider by typing "---"
Add code block
You can also add equations inline in Notion by typing dollar sign, and typing your equations. For example to add 2+2 you can type $2+2$. You can also add equations block by typing three dollar sign $$ and typing your equations. For example to add 2+2 you can type $$2+2$$.
Tips for Using Blocks to Structure Your Notes
Some of the blocks you may want to use in your notes are:
- Callout features to highlight key points or ideas you want to remember.
- Quote text for citation.
- Table block to store comparisons.
- Create columns.
- Add tasks.
Creating a table to organize information and add a to-do list. With the Notion text editor, you can also organize blocks of text into columns, add images, videos, attach PDFs, or insert inline text.
Add a reference to other pages.
to add a reference to other page simply type
“@” navigate “link to page” or type the name of the page to find it and then click ok to add a reference
Want to make your note more aesthetic? You can check out this article that explore additional features you can use to enhance the aesthetics of your note.
Using Notion to keep track of deadlines and projects
To keep track of your deadlines, homework, assignments, or events, you can use Notion. The best way to do that is to create a table database and add your tasks, scheduling them with dates. When you add a date to a database entry, you can also set reminders.
This is a simple database you can use to track deadlines, tasks, and assignments. You can add tags to the database, include dates, and attach files (such as PDFs or study materials). The best views for keeping track of deadlines are the calendar view or the timeline view.
Using Notion for Studying and Exam Preparation
Preparing for exams can feel daunting, but with Notion by your side, you can tackle it with confidence. There are several ways to use Notion to help you stay organized and on top of your studies for an upcoming exam.
First, you can create a new page for your exam preparation and then create a database for your materials. You can organize this database by subject or by module. You can also add tags to each item in the database so that you can easily search for the materials you need.
Once you have all your materials organized, you can start creating a schedule for your exam preparation. Create a timeline view to keep track of deadlines and use it to plan out your studying schedule.
A studying schedule will help you break down large materials into small chunks of smaller sections and sub-topics. You can then assign a task in your academic planner for each study session and track it with a database.
If you are used to the Pomodoro tracking system, you can easily implement it on Notion by adding a Pomodoro widget.
Use Notion to Set Your Academic Goals
Notion can be used to plan your academic journey, from setting course goals to tracking your progress towards graduation. You can create pages for each semester, add specific academic goals, and track your progress towards achieving them.
This will help you stay focused and motivated throughout your academic career.
Collaborate with Classmates
Notion's sharing capabilities make it easy to collaborate with your classmates on group projects and assignments. You can create shared pages for group discussions, share notes and resources, and track progress together.
To do so, pick a page you would like to share with your classmate or study buddy, then go up to the settings and click on share. Add the email of the user you want to invite, or share the link with them.
Another quite useful way to use the sharing setting is to make your class notes available for your class. Just share the link with them. You can also create shared class notes, where anybody can contribute and improve.
Quite nice, isn't it?
Use Notion to Create Your Knowledge Base
There are many ways in which you can use Notion as a student, but one particularly cool thing about a Notion workspace is that it can evolve with you. So, while you're studying, why not start using it as a knowledge base and build your own Second Brain or Zettelkasten database in Notion? This can consist of important notes and knowledge that you may want to reference later in your career.
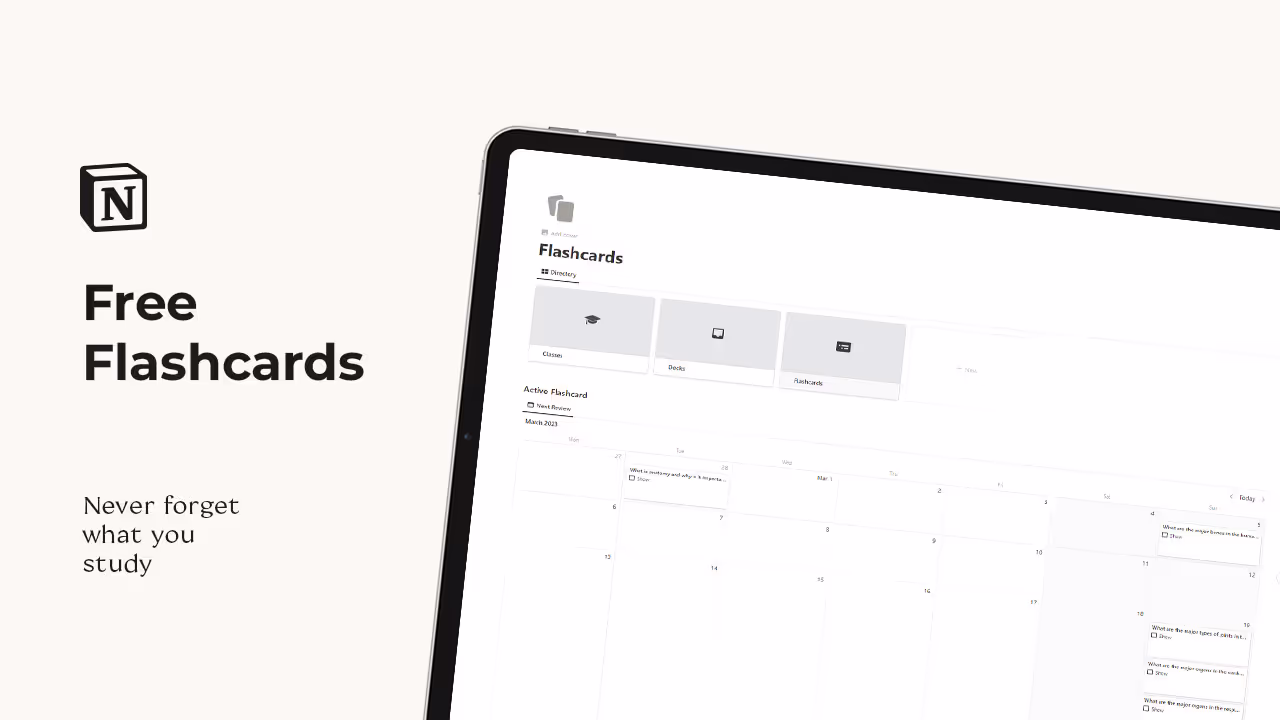
How to use Notion to create flashcards
Did you know that you can also create flashcard directly inside your Notion page?
Using Toggles for creating Flashcard
A simple trick to use flashcards and active recalling is to structure your notes into questions and answers. Then, you can hide the answer inside a toggle. So, when you are preparing for an exam or studying your material, you can read the questions and give the answer. Afterwards, click on the toggle to review if you aced it or not.
That’s is super easy to achieve, and can be done seamlessly where you take your notes, but if you need a more powerful system you can create, plan, and track your active recall with Notion.
Flashcard Systems with Database
Building an active recall system in Notion does require some work and knowledge about formulas and databases, but luckily I've already built one for you that you can just download and add to your dashboard.
This minimalist flashcard template, designed by Notion Avenue (that's me!), is a fully-spaced repetition system designed to help you achieve your study goals. With flashcards, you can easily memorize what you study. The active recall system is perfect for students who need to memorize a lot of information and ensure they retain it throughout their career (such as medical students).
The template includes three interconnected databases where you can organize your flashcards by deck and subject. Based on your understanding level (poor, okay, great) and the last review date, the template will automatically set a repetition date for the next active recall section for each flashcard.
How to Customize your Student Dashboard
You can add a widget in Notion; it's super simple. As a student, if you study with the Pomodoro timer as your study technique, you can just include a widget to help you track your study sessions with ease. Alternatively, you can also create a Pomodoro Timer in Notion. The second option will allow you to track your study sessions more efficiently and what you studied for each session. You can also calculate how many hours you study each semester if you use the tracker daily.
Customize the Cover
One of the best ways to turn around a boring page is to add a cover. You can choose the cover from the gallery (a selection of ready-to-use images from Notion), upload your own cover (for free accounts, the limit is 5 MB), add a cover by link (super useful!), or explore royalty-free, high-quality images from the Unsplash library.
Your Notion is Boring?
Learn how to Make the Best Out your Workspace and elevate your notion with the Ultimate Aesthetic Guide for Notion.
Add a Pomodoro widget for studying
That is something I'm quite proud of, and that's a Pomodoro timer widget built by me. It works as your traditional Pomodoro timer, with 25-minute sessions and short and long break sessions, but it can be customized with all Notion Palette, so it will fit any style or aesthetic in your workspace.
Notion Minimalist Pomodoro Tracker

- Copy the URL https://www.notionavenue.co/widgets/pomodoro-timer
- Open Notion page
- Paste the URL in a empty block
- Create Embed and press ok.
Start with a Template
See our Free & Premium Templates for Notion
Want to get an head on Notion and you don’t want to build your own template? I’ve got you.
Here a list of the Best Student Template for Notion (Both paid & Free)
Notion Templates for Students
Student OS for Notion
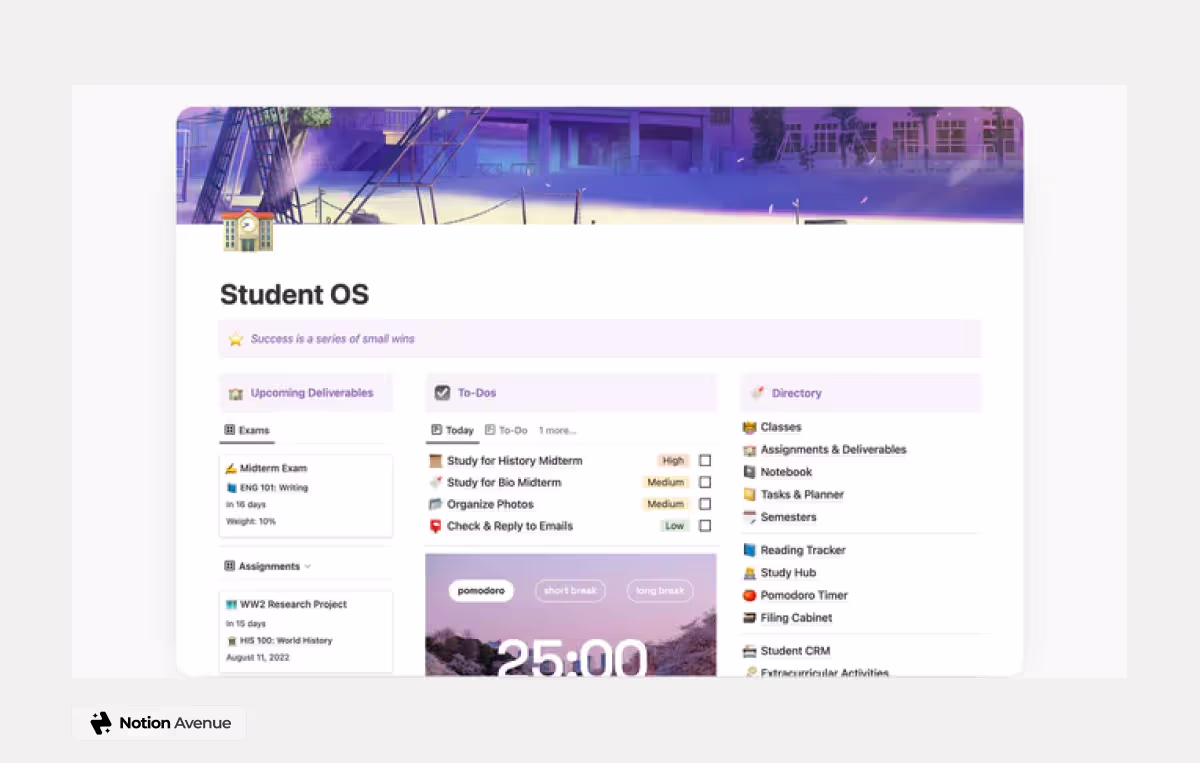
The Student Os template by Gridfiti is an all-in-one dashboard to organize your life as a student. The template is available in two styles: aesthetic (the one shown in the preview) and minimal. The dashboard gives you quick access to all the main features of the template, and there is also a Pomodoro timer to optimize your productivity.
Janice Study Student Dashboard

Designed by YouTuber Janice Study, this student dashboard template is one of the most downloaded templates on the Notion Template Gallery. The template is free, aesthetically pleasing, and comes with an extensive video walkthrough that you can watch on YouTube.
Use Notion Ai tool as your study-buddy
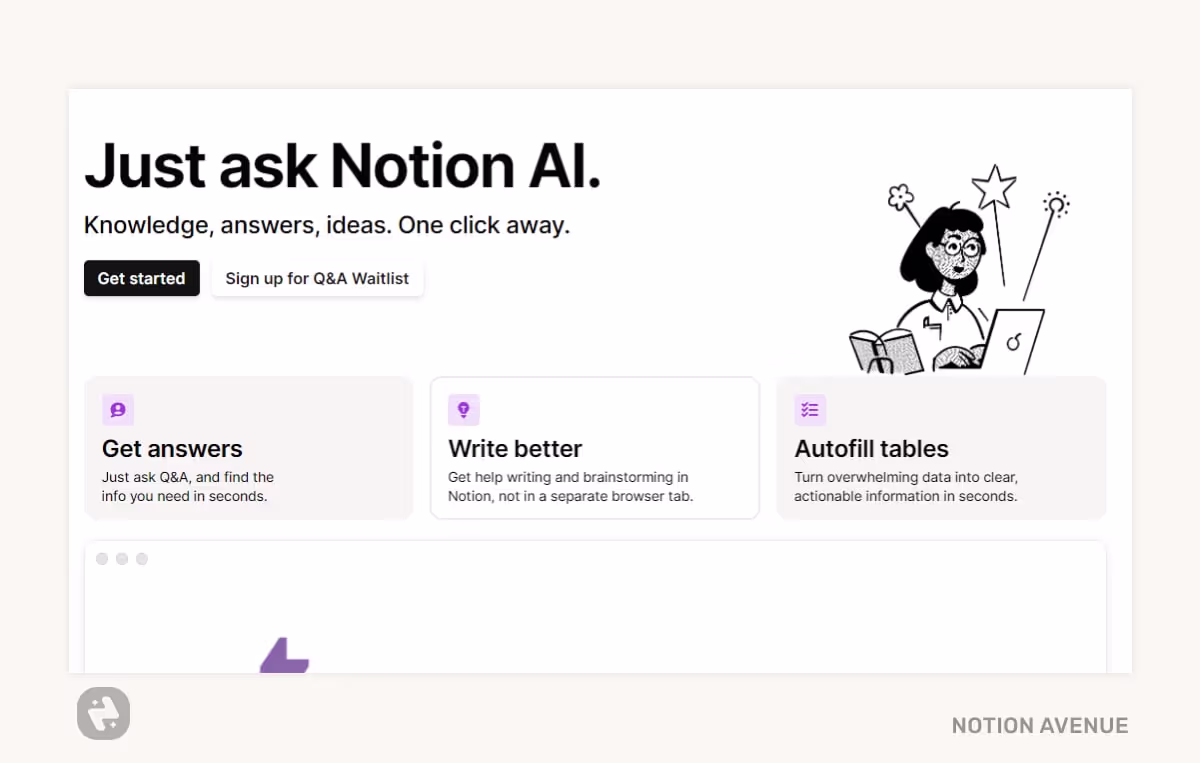
Notion AI is a powerful tool available to Notion users that can help students get organized and stay on top of their studies. You can quickly create summaries of articles, generate flashcards, and store notes in an organized and easy to access way. Note that Notion AI is a paid featured, but you have some free credit to try before committing to a premium plan..
Example of how Students can Use Notion Ai
Here are some examples of how you can use Notion AI to study for a particular subject:
For a history class:
- Use Notion AI to generate summaries of key historical events and figures.
- Create flashcards to test yourself on dates, names, and important events.
- Use Notion AI to generate maps and timelines to visualize historical concepts.
For a science class:
- Use Notion AI to generate simplified explanations of complex scientific concepts.
- Create practice problems and quizzes to test your understanding of scientific formulas and theories.
- Use Notion AI to generate diagrams and graphs to illustrate scientific principles.
For a language class:
- Use Notion AI to generate vocabulary lists and practice conversations.
- Create flashcards to test yourself on grammar rules and verb conjugations.
- Use Notion AI to translate sentences and texts from one language to another.
Create a Student Dashboard from scratch (Step-by-Step)
Here's a step-by-step guide on how to create a student dashboard from scratch in Notion:
Step 1: Create a new page
Start by creating a new page in your Notion workspace. This will serve as the foundation for your student dashboard.
Step 2: Add a title
Give your student dashboard a clear and concise title that accurately reflects its purpose. For instance, you could name it "Student Dashboard" or "My Academic Hub."
Step 3: Structure your dashboard
Organize your dashboard into sections using the Notion table view. This will help you keep your information organized and easy to access.
Section 1: Upcoming Deadlines
Use a calendar view to track upcoming deadlines for assignments, exams, and other important academic commitments. You can color-code the events to differentiate between different types of deadlines.
Section 2: Course Notes
Create a database to store your class notes for each of your courses. You can use the "Kanban" view to organize your notes by topic or due date.
Section 3: Personal Planner
Create a table or to-do list to manage your daily tasks and appointments. You can include sections for personal errands, extracurricular activities, and social events.
Section 4: Resources
Compile a list of useful resources for your studies, such as online tutorials, reference books, and study guides. You can organize the resources by subject or type.
Step 4: Personalize your dashboard
Customize the appearance of your student dashboard to make it more visually appealing and user-friendly. You can change the background color, font style, and theme to match your preferences.
Step 5: Add images and links
Enhance your dashboard with images and links to relevant resources. This will make your dashboard more engaging and informative.
Step 6: Embed widgets
Utilize Notion widgets to add interactive elements to your dashboard. For instance, you can embed a weather widget to track the forecast or a calendar widget to view your upcoming events.
Step 7: Share your dashboard
Share your student dashboard with your classmates, teachers, or tutors to collaborate on study plans and share resources. You can also password-protect the dashboard if you want to restrict access.
Wrapping Up
In conclusion, Notion is a powerful tool that can greatly enhance a student's organization and productivity. With Notion by your side, you can stay organized, focused, and motivated throughout your academic journey. So start using Notion today and take your student life to the next level!
Happy studying!
I'm currently helping as many students as possible harness the power of Notion to achieve academic excellence and pave their way to career and personal success. If you're interested in learning more, make sure to join the waitlist for my "Thrive with Notion: Student Masterclass."
P.P. S. Take a look at Notion Avenue YouTube to level up your skills with in depth tutorial, Instagram for quick tips and hacks for Notion, or come say hi on X
Frequently Asked Questions
Is Notion Good for Medical School?
Yes, Notion can be an excellent tool for medical school students. Its flexible layout and organization options make it easy to manage complex course materials, take detailed notes, and collaborate with peers. You can create databases for different subjects, track deadlines, and even use AI tools to generate summaries and flashcards.
Is Notion Good for Student
Absolutely! Notion is a versatile tool that can benefit college students in various ways. Whether you're juggling multiple courses, staying on top of assignments, or collaborating with classmates, Notion provides a centralized platform to manage your academic life.
Is Notion Free for Students?
Notion offers free access to its basic features, which can be sufficient for most students.
You may also be interested
Best Notion Templates for Students for 2024 (Aesthetic & Free)
